If you’re running a business online then you need a professional online presence on Facebook. Maybe you don’t know how to start a Facebook business page or you’re not sure if it’ll make a difference?
Whatever your reason, know that Facebook is a game changer in business.
Not only can you expand your business presence online but, it’s an avenue for attracting customers through Facebook ads, building customer relationships, creating engagement, and a host of other amazing benefits for your company.
Facebook has 2.8 billion monthly users with over 1.8 billion users visiting Facebook on a daily basis.
There are over 60 billion Facebook business pages including popular retailers like Nike, Lululemon, and Amazon.
Facebook is often called the king of social media, attracting billions of users across the world to interact and engage on their network.
If you don’t have a business presence on Facebook, you’re leaving a lot on the table.
Creating a Facebook business page doesn’t have to be a difficult task. In just a few steps you can have your Facebook business page up and running. In this article you’ll learn 5 steps on how to start a Facebook business page for your brand.
Let’s get into it.
How to start a Facebook business page
The process for starting your Facebook business page is fast and easier than you think. In 5 steps and less than an hour of your time, you’ll have your Facebook business page ready and can start sharing your content and interacting with your audience.
Requirements for starting a Facebook business page
Business pages on Facebook are 100% free. All you’ll need is:
- A personal Facebook profile
- Your business name
- Photos for your profile
- Your call-to-action
A personal Facebook profile is a requirement in order to have a Facebook business page. Information from your personal profile will not appear on your business page unless you choose to share it there. Your personal profile and business page are considered separate on Facebook.
Your business name you’ll have readily available. This is likely what you will want to name your Facebook business page.
You’ll need a profile photo and a cover photo. You can use your logo, photo of the owner, images of your store, staff, or products, etc. These are the photos that will represent your brand.
Your profile photo is the small circle and the cover photo is the banner image.
The profile photo must be following dimensions:
- 170 x 170 pixels (for computers)
- 128 x 128 pixels (for smartphones)
- 36 x 36 pixels (for most feature phones)
The cover photo will have these dimensions:
- 820 x 312 pixels (for computers)
- 640 x 360 pixels (on smartphones)
At a minimum, the cover photo should be at least 400 x 150 pixels tall.
You can learn more about photo dimensions here.
The call-to-action is the desired action you want Facebook users to take. For example, you might want users to visit your website, sign up to your email list, etc.
What are the Facebook business page call-to-action buttons?
There are 5 call-to-action buttons available:
Book: This is for customers to book or schedule an appointment or meeting with you. They can do this right through your Facebook business page with this CTA. The CTA button is “Book now.”
Contact: If you want people to contact you through Facebook Messenger or another route like phone or email then this CTA is what you want. You can choose from “Call Now,” “Contact Us,” “Send Email,” “Send Message,” or “Sign up,”
Download: This CTA is for downloads, like downloading an app. “Play game” or “Use app” is the CTA button you can pick from.
Learn more: You want visitors to read more about your business on your website or you direct them to watch an information video. The CTA button will say :learn more” or “watch video.”
Shop: This is when you want to direct visitors to shop your website. “Shop Now” or “See offers” are the CTA buttons you can choose from.
Here’s more information on Facebook CTA’s.
Step 1: Create a Page
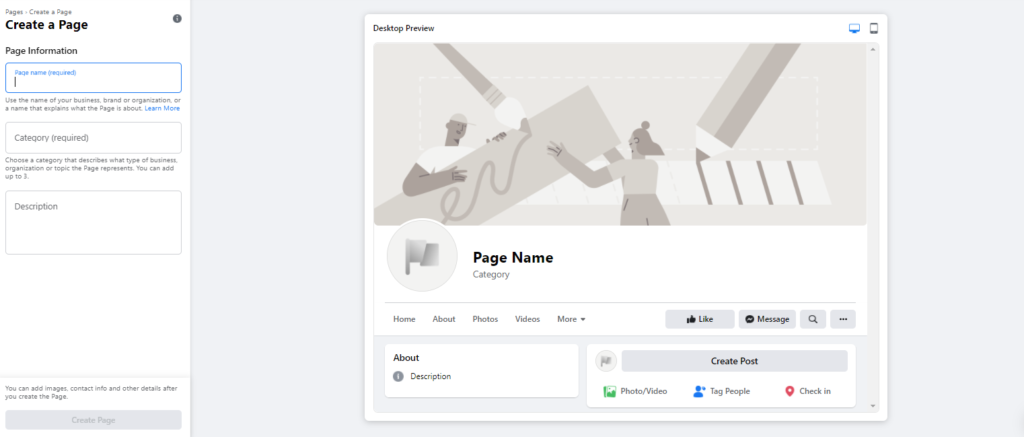
To get started you’ll sign up at Facebook.com/pages/create.
Then you can begin to build out your Facebook business page. You’ll add information about your business like:
Page name: This can be your business name or a name that explains what the page is about.
Category: The category should describe what kind of business you run like a clothing brand, ecommerce website, etc.
Description: The description tells visitors what your page is about. You can write a few sentences or more sharing what you do, why you do it, and who your customers are.
Step 2: Setup your Page
Once you finish step 1, you’ll have more fields become available like Images, where you add your profile photo and cover photo.
Add these images. Click Save and you’re done!
Step 3: Provide Info and Preferences
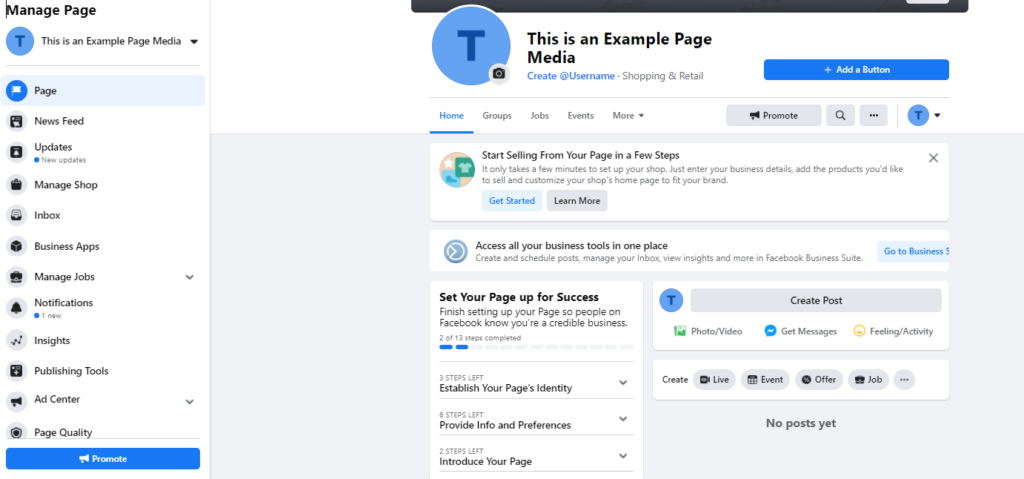
After step two your page will be created but, you’ll still have a few more steps to go through to finish your business page setup.
You’ll provide your business info and preferences.
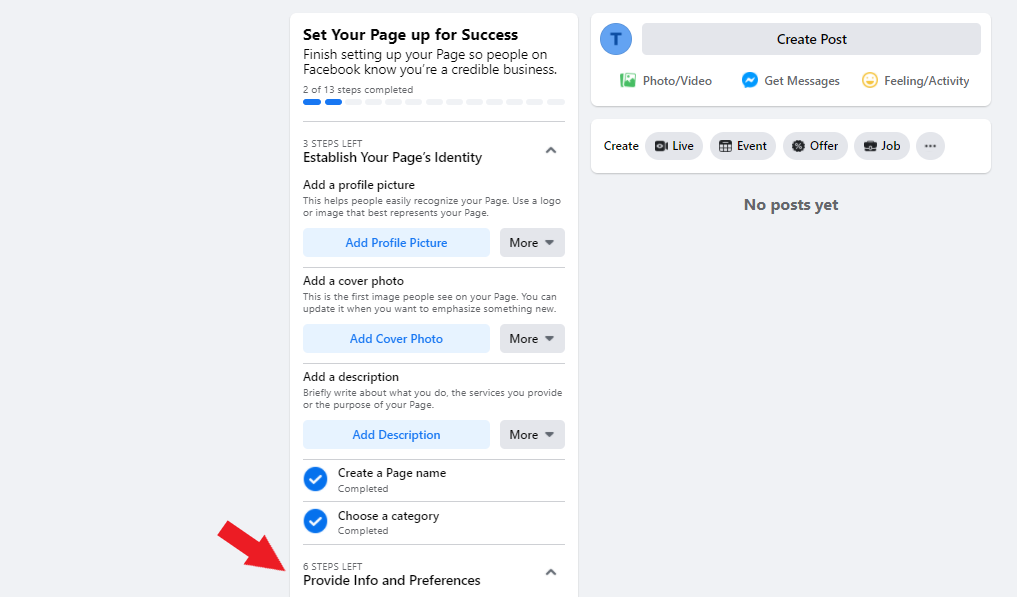
You’ll add all this info:
- Website: You can add your website url.
- Location info: If you want your business address or service area displayed, you can add these details here.
- Business hours: This is for your business hours.
- Phone number: You can add your business phone number.
- Messaging preferences: You can connect WhatsApp for customers to contact you.
- Action button: This is the CTA button you can add, like Shop Now, Book Now, or other options, as shared above.
Step 4: Introduce your page
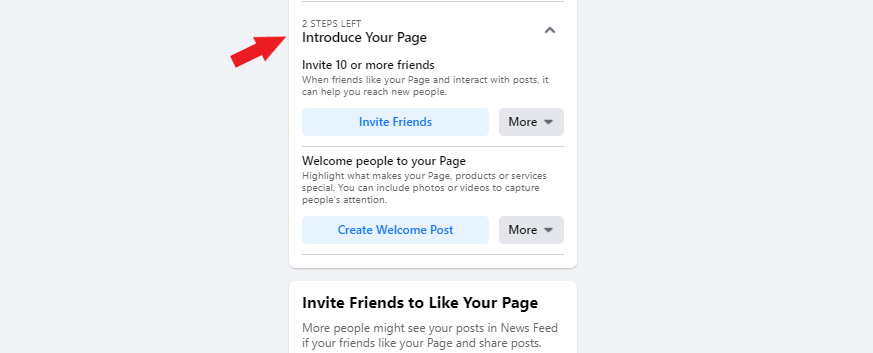
Your page is complete. Now, you can start promoting it and introducing it on Facebook.
First, you can tell your Facebook friends about your business page. Friends that like and interact with your page can help you reach a new audience.
Have you ever been on Facebook and received a notification that a friend requested you like a new page?
You can do that!
This is a great way to get a ton of support from your friends and family so you can begin to grow your Facebook business page instantly.
You can also create a welcome post welcoming new people to your business page.
- Talk about why you created the page
- Share what makes your page special
- Share video and photos to capture attention and create engagement
Step 5: Create a username and publish!

First, click the link to create a username.
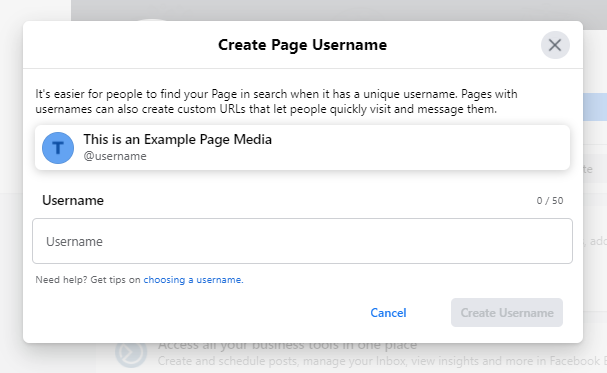
Then, type in the username for your Facebook business page. The username will help you create an easy to identify Facebook business page url.
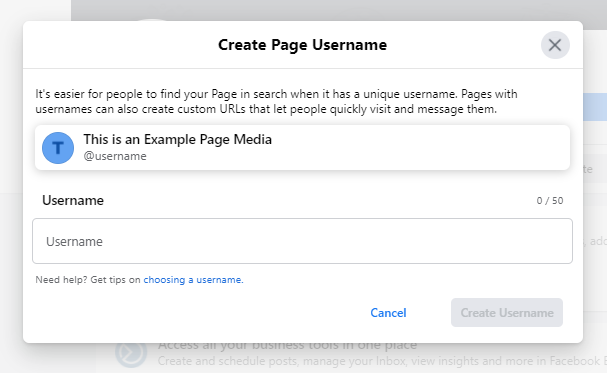
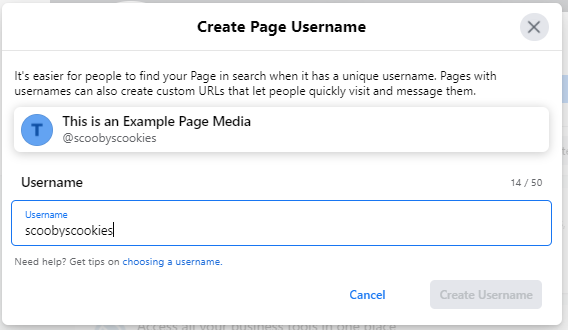
For example, if your business is Scooby’s Cookies, you could create a username like @scoobyscookies and your Facebook business page url will be www.facebook.com/scooby scookies.
What’s next?
With your Facebook business page created, now you can start posting and promoting your page.
How to create your first post?
Think about what you want to post:
- Announce a sale
- Share your business story
- Share valuable information or content
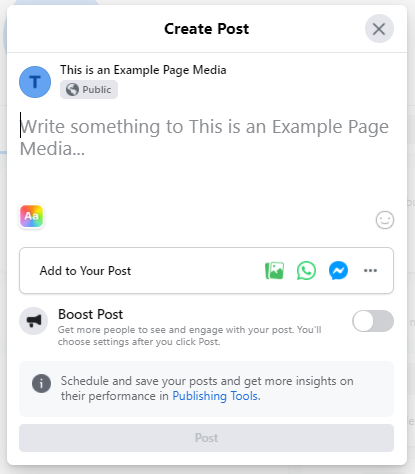
Then, craft your post.
You can be as creative as you’d like here, adding images and video, Facebook tools and more to your post.
How to promote your Facebook business page?
Share your Facebook business page everywhere you do business.
- Add your Facebook page to your email signature
- Add your Facebook page to your business cards
- Share on other social media like LinkedIn, Instagram, Twitter, etc.
- Share with friends/family
Continue to contribute to your Facebook page over time by posting, sharing news and videos, interacting and engaging with fans.
Related: How to do Facebook Marketing
Add a pinned post.
A pinned post is a Facebook post pinned to the top of your Facebook page, kind of like a sticky note.
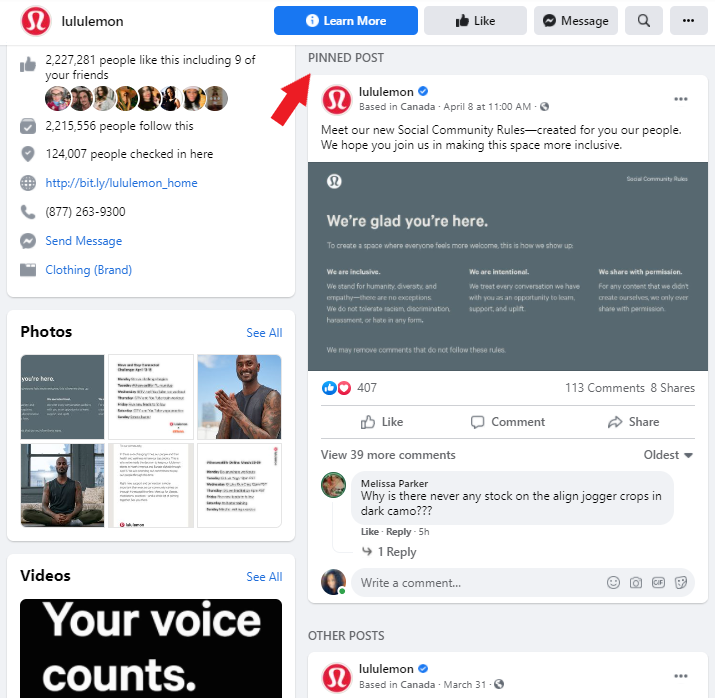
You can pin an introduction to your visitors. You might want to welcome visitors to the page, talk a little bit about your business, and share important updates.
The pinned post sits right below your page cover image so it’s a high visibility area and a good place to pin content you want to get a lot of eyeballs on.
To create a pinned post, simply write your Facebook post as normal and then click “Pin to the top of the page.”
When you want to remove the pinned post just click “Unpin from top of page” which will unpin the post and you can pin a fresh post in its place if you’d like.
The Facebook Scheduler
Facebook has a scheduler built into the posting tool so you can schedule your posts out according to your content calendar.
Scheduling your posts allows you to batch your Facebook content, which saves time and means that content is going out on a consistent basis.
When you’re creating your post, you’ll have two options: schedule or post.
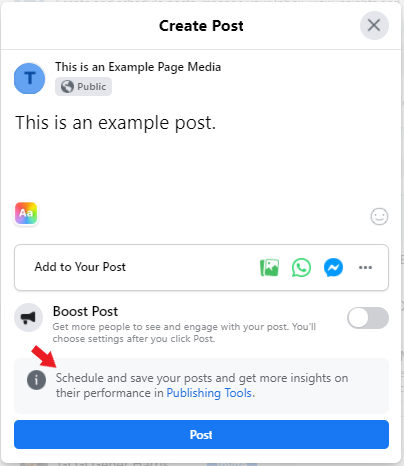
The post button is the big blue button that says Post. You click that button to instantly publish your Facebook post.
The scheduler option is just above that Post button in the gray field saying “Schedule and save your posts.”
Step 1: Write your post
Step 2: Click the “Publishing Tools” link
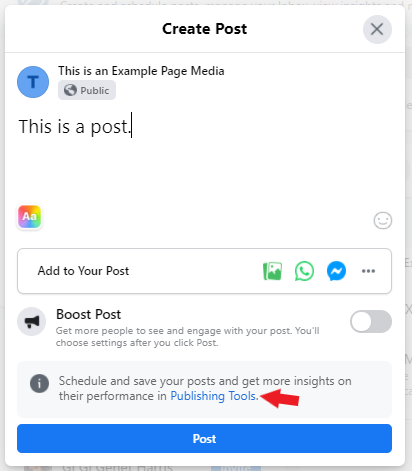
Step 3: Finalize your post
Land on the Publishing page where you can finalize your post and access the Schedule option.

Step 4: Schedule
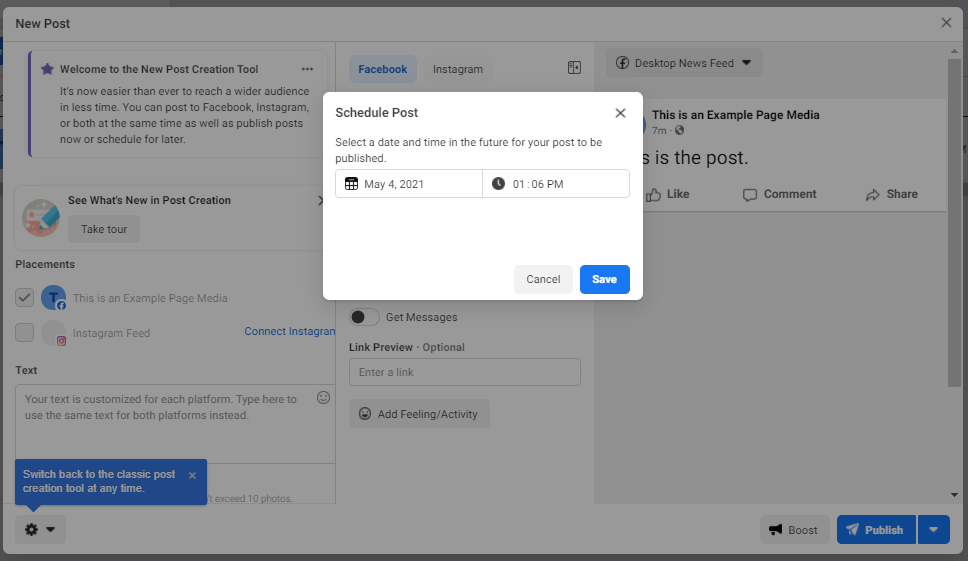
This is where you can schedule and save your post.
How to optimize your Facebook business page
Optimizing your Facebook page is about creating the best experience for people landing on your page and getting the highest conversion rates possible for your business.
You want to create engagement, share important information about your business and achieve your goals, whether it’s growing your email list or funneling traffic from Facebook to your website.
Review your business page settings
The settings of your business page are like the behind-the-scenes action that powers your page.
Your page settings are found in the left navigation bar of your page:
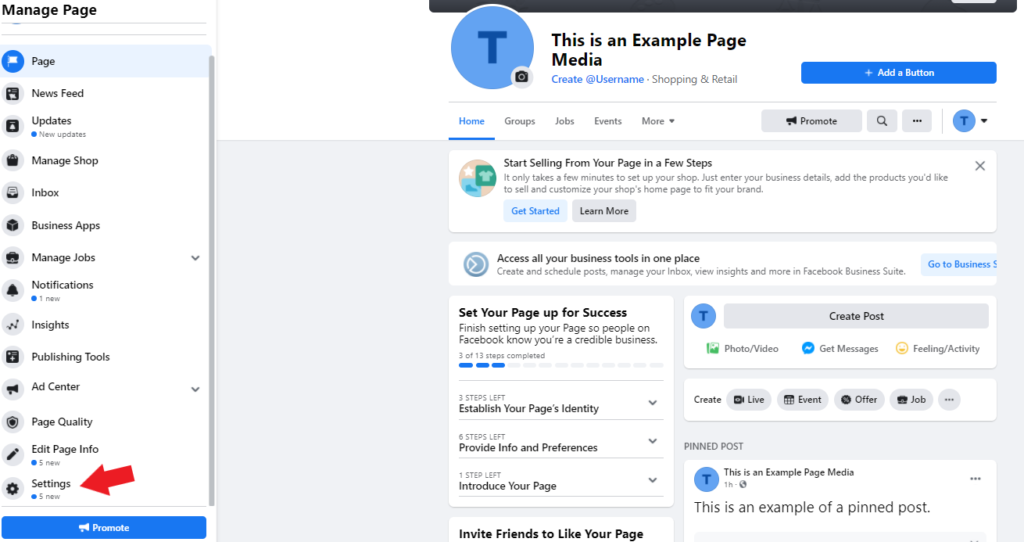
Your Facebook business page settings look like this…
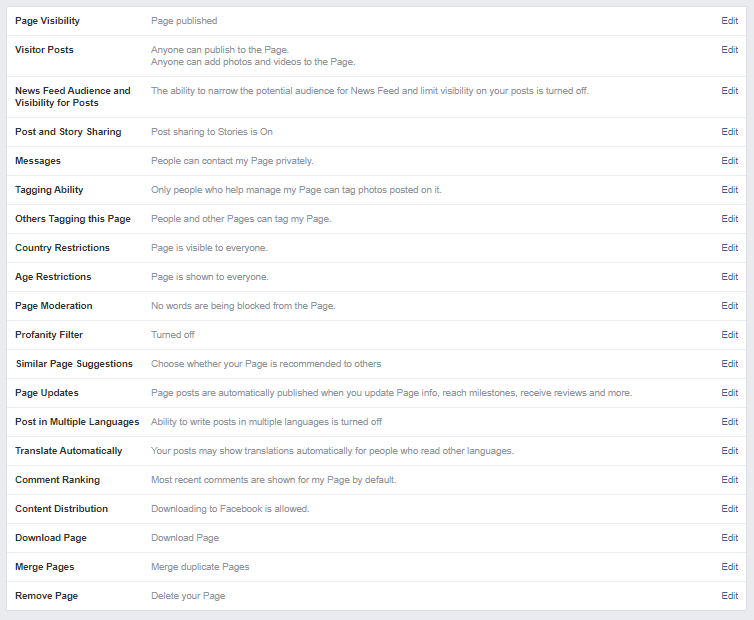
Here you can tweak settings for things like:
- Post sharing
- Story sharing
- Profanity filter
- Page moderation
- Age restrictions
- Comment ranking
- Page updates
Go through each setting to make sure it’s set up according to your preferences.
As your business grows over time you can continue to check back on your business page settings to edit each section, as needed.
Look into Page Insights
Facebook Page Insights are an invaluable tool that give you information to help you better understand your audience.
You can review page likes, post comments, views, and more.
This information can help you learn about which posts are performing the best, what kind of people are interacting with your posts, etc.
You can find Page Insights in the left navigation bar of your Facebook business page:
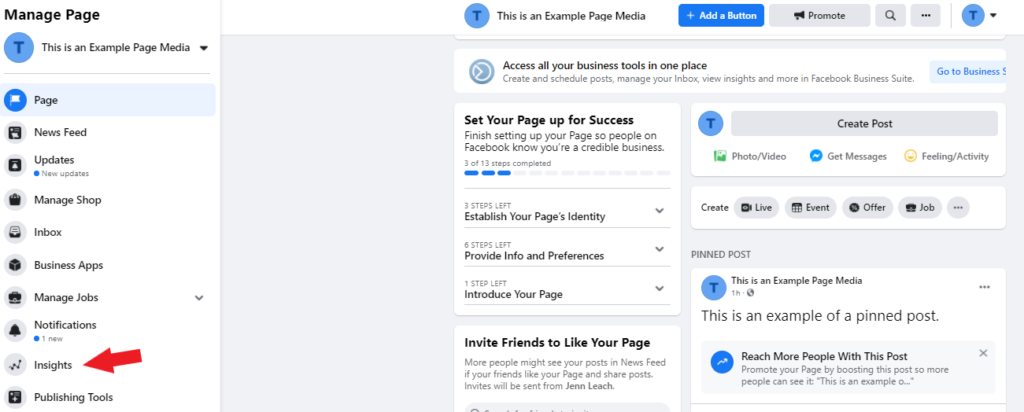
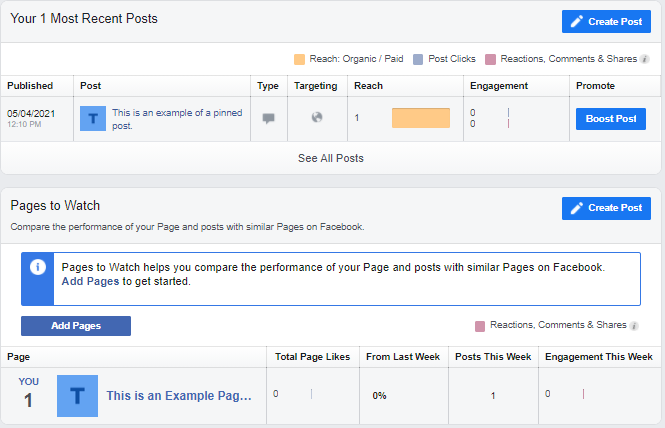
Once you click Page Insights you’ll be taken to this page:
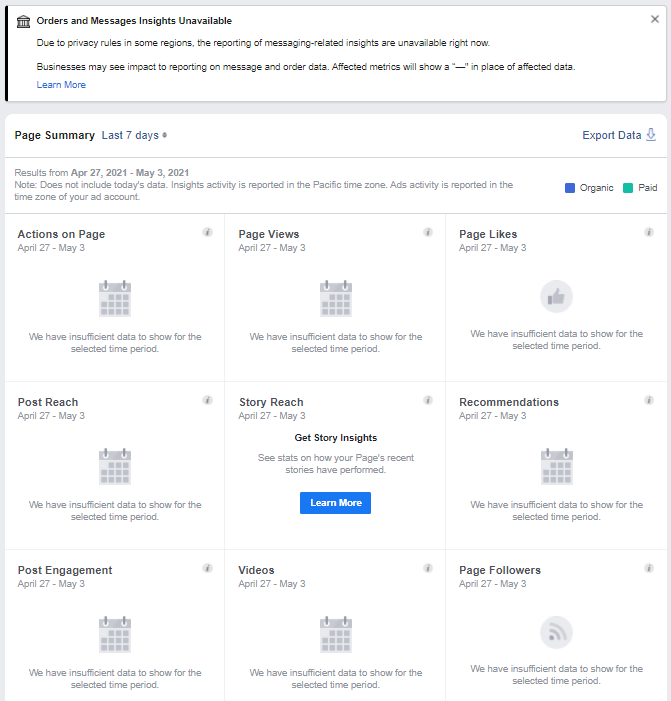
From here you can navigate across each section to look at page actions, page views, etc. You can review your Facebook post insights further down on the page here:
Final word on how to start a Facebook business page
You’re done! You’ve just started your Facebook business page. You learned about how to create and schedule your posts, promote your Facebook business page, and optimize your business page.
What’s next?
First, while you’re on Facebook, get to know it a bit better. Browse other business pages, show support and like their page and posts, make comments, and engage with others.
You can like pages and posts as your Facebook business page!
This is another cool way to promote your page in an indirect way and it could help you get more activity and likes on your page, similar to what Gary V. describes in his $1.80 strategy for Instagram.
Next, run Facebook ads!
Learning how to run Facebook ads is a low cost, effective way to drive targeted traffic to your business. Virtually every business can benefit from Facebook ads. To learn more about running Facebook ads, check out these helpful resources:

Leave a Reply